Do a creative project every day for four straight days.
Projects must be completed in a day, so they need to be as compact as they are creative
Each project needs a name and documentation posted by the end of the day. Each should be a stand-alone accomplishment
day 4
By yuditskaya on January 2011
a right click menu in the form of a plug in for pd that plops down objects for you:
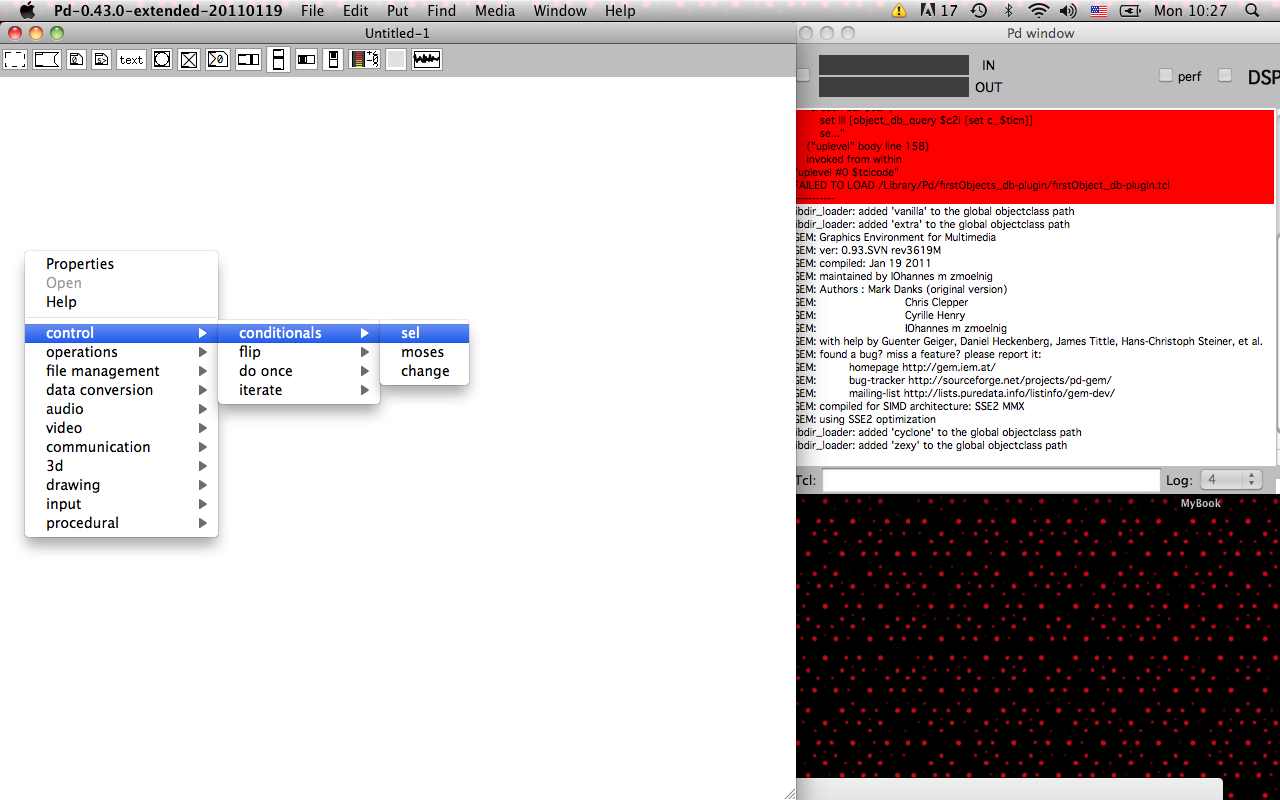
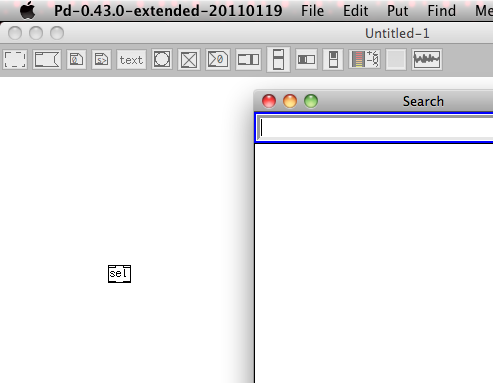
also note the search window! pd is getting a bunch of useful functionality built in!
Add comment | January 24th, 2011
day 3
By yuditskaya on Day 3, January 2011
another one with lost beads from a tibetan necklace. This one has 11 strands, they did not tie neatly in the back, managing many strands is a tricky matter, luckily the clasp hides most of my indiscretions.
Here is a helpful video on using crimping beads: http://www.youtube.com/watch?v=I3Hy5KjSPLw
they are conductive, now that I can make pretty necklaces, maybe I can start using electrical components in them.
However, what electrical component has the mystical powers of a lost tibetan bead?

Add comment | January 24th, 2011
day 2
By yuditskaya on Uncategorized
a tibetan necklace broke at a shop on the way to school. I bought some beads cheap and made a new one.
the necklace has three strands, passing by the tibetan beads as a hub, with brass spacer beads tying off the back, with a brass clasp.

Add comment | January 24th, 2011
The Incident: Sweded
By Greg Borenstein on Day 4, January 2011, Uncategorized
Mike Cohen, David Phillips, Spike McCue, Liza Singer, and I spent all day yesterday building the props, shooting, doing the music, and editing “sweded” version of the iphone game The Incident. “Sweding” is a style of lo-fi recreation of movies that was invented by Michel Gondry for his film, Be Kind Rewind. Check out Gondry’s original explanatory video, how to swede.
The Incident is a fun 8-bit style iphone game where you play Frank, an ordinary seeming guy in a suit who begins to have a very bad day when every object in the world mysteriously starts falling out of the sky:
So, without further ado, here it is, The Incident: Sweded
The Incident: Sweded from Greg Borenstein on Vimeo.
Add comment | January 21st, 2011
It’s a Toilet Paper Dispenser
By MichaelColombo on Uncategorized
I needed a new one.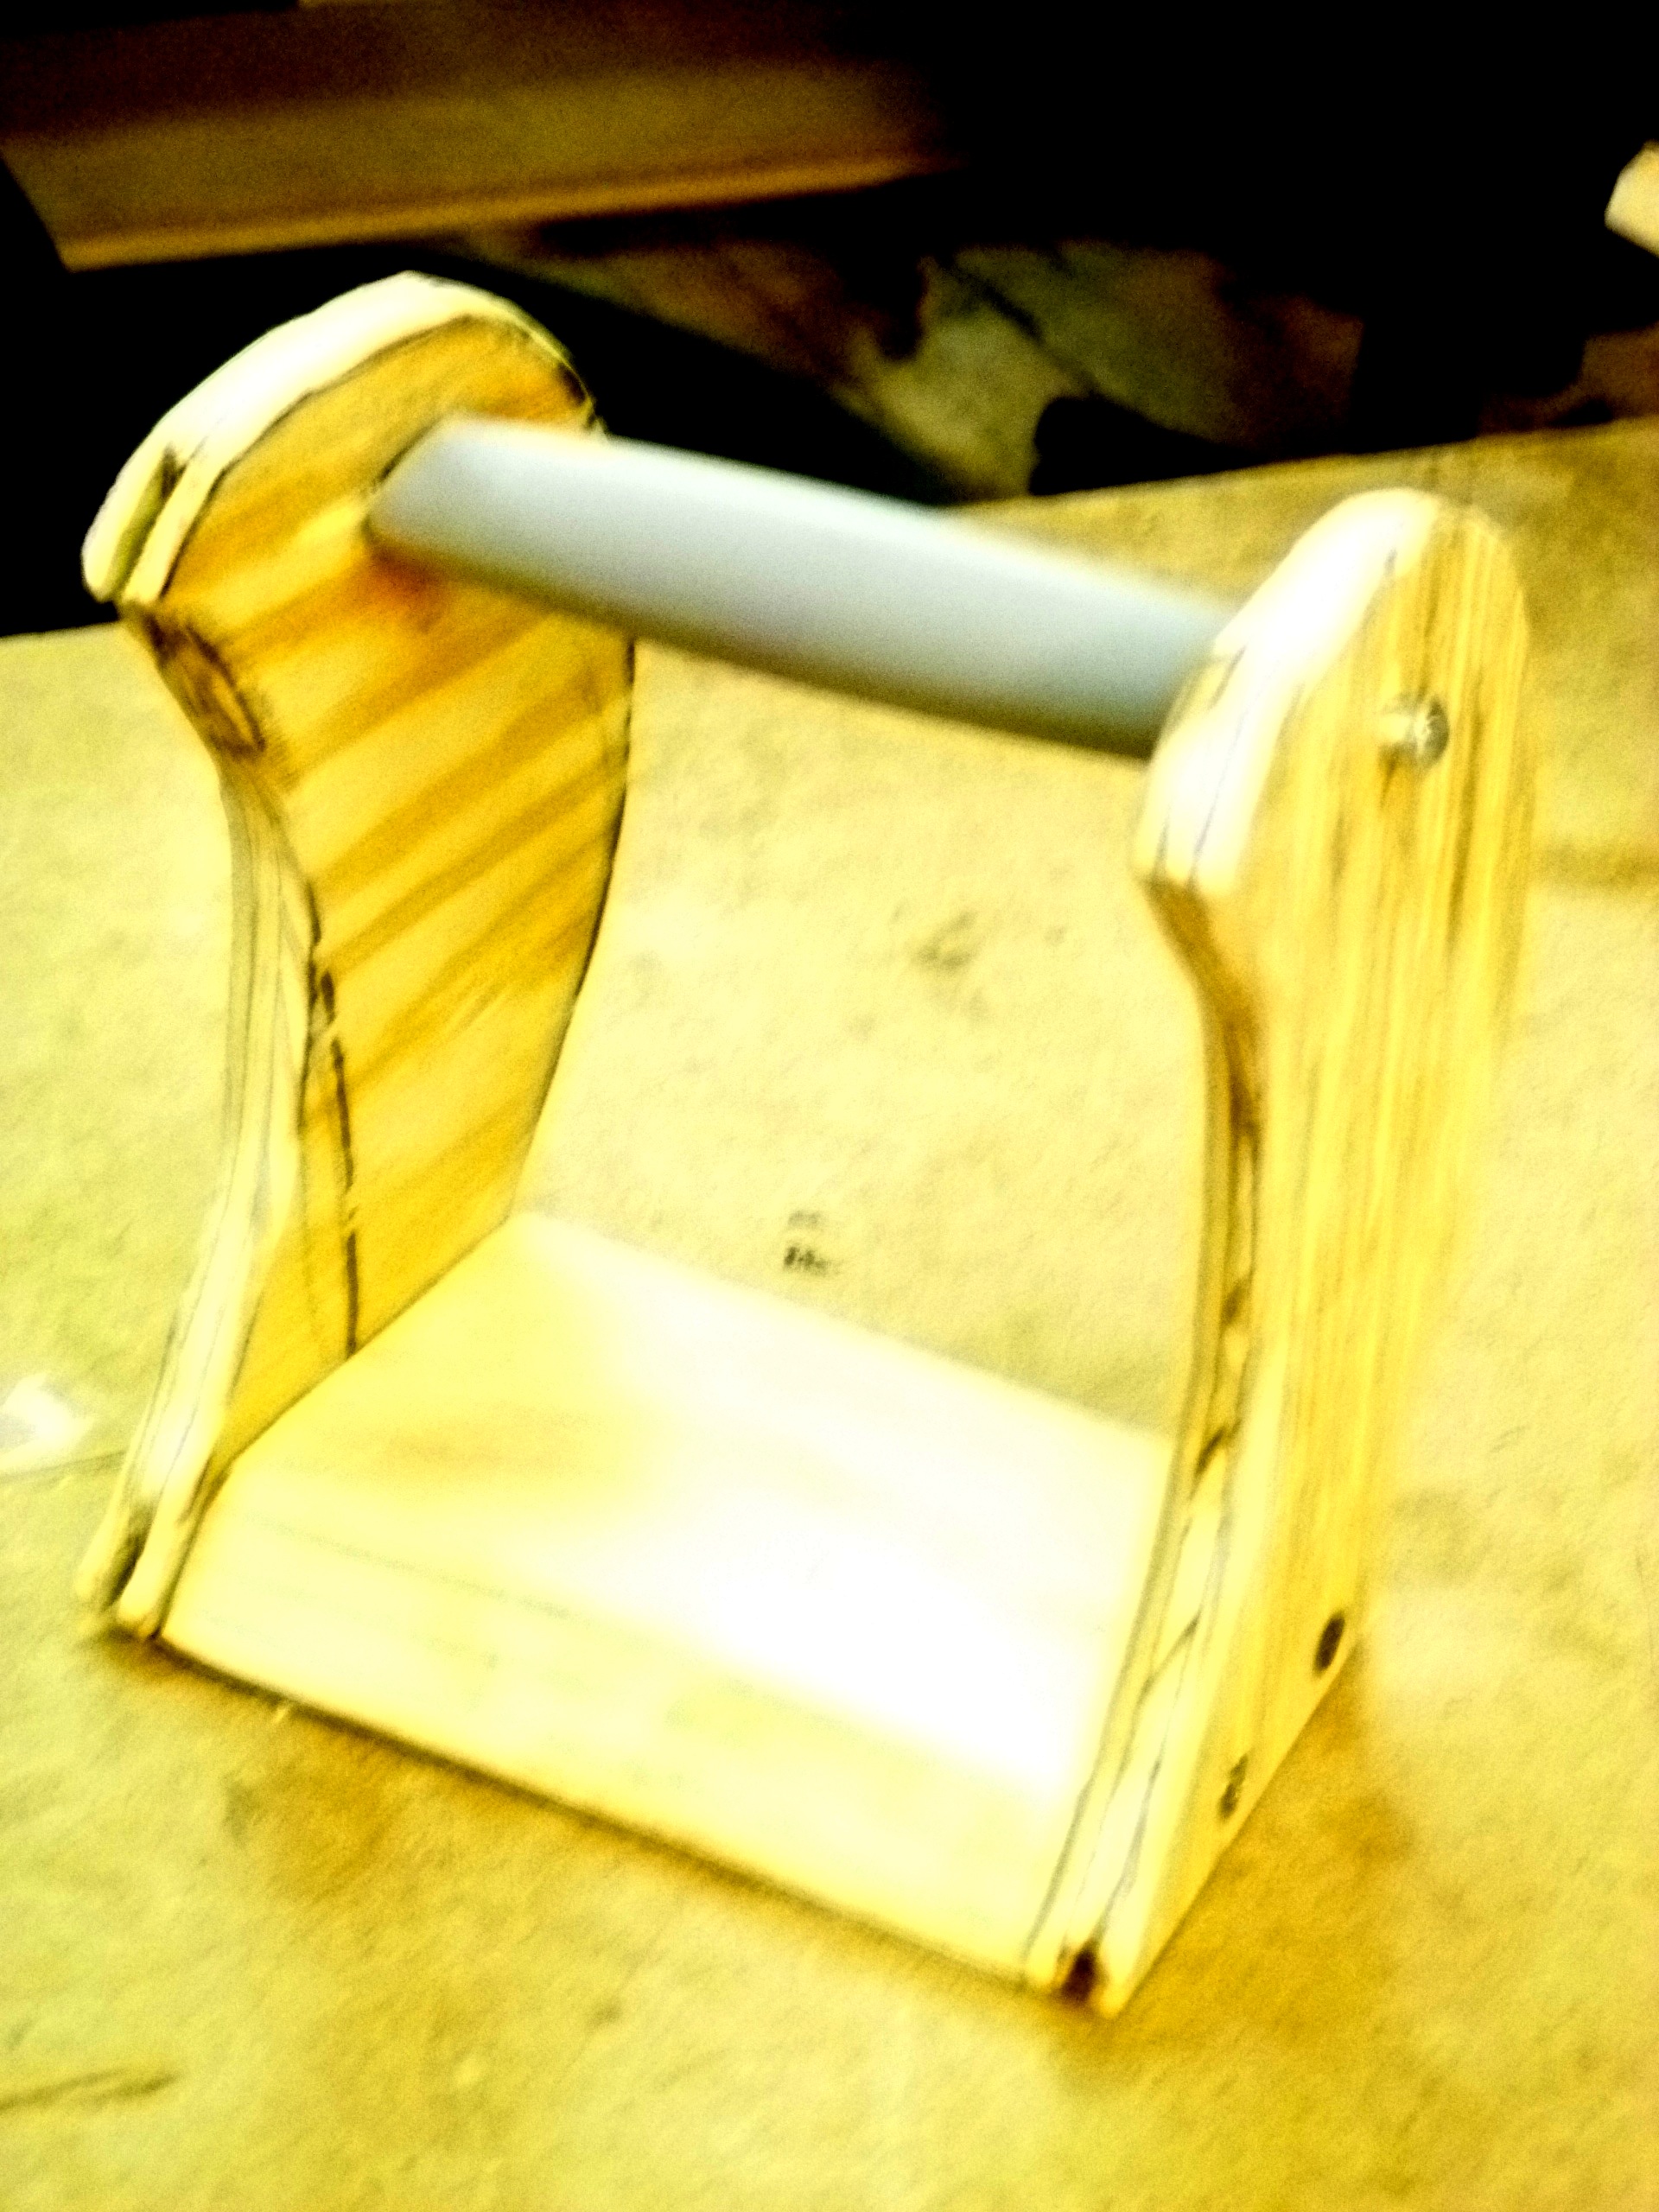
Add comment | January 20th, 2011
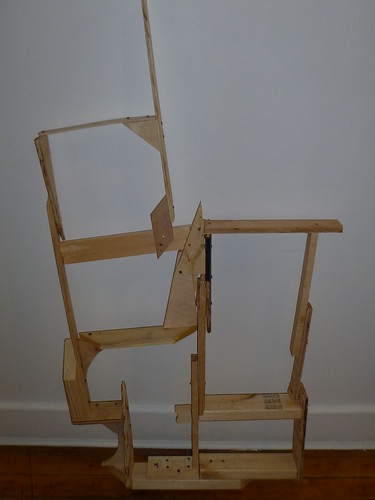
Junked LCD Tableau, Continued
By MichaelColombo on Uncategorized
Progress was made on day 1 – I slapped together the frame out of scrapwood, and documented myself doing this with IStopMotion. Enjoy this short video: (and if anyone can tell me why my embed code is not working I’d appreciate it).
Though I have done several assemblages like this before, this presented a new challenge since I needed to take the size and placement of the screens into account. This required some planning for a process which had been very much spontaneous for me in the past.
After the frame was completed, I used a router and hand saw to carve out spots for the LCDs to sit. Once done, I hot glued them in on the edges, then set about wiring them up.
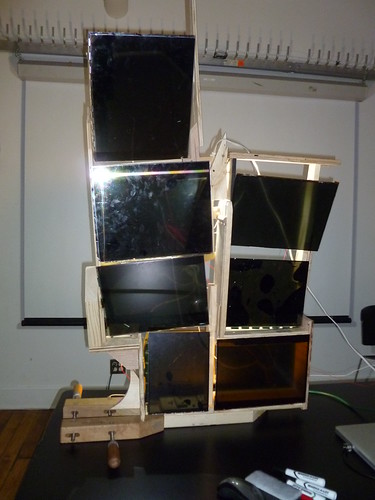
Here’s where I ran into problems. Some of the LCDs had existing circuit board hanging from them, which were a cinch to solder to. Other ones only had the thin ribbon connectors attached to them with tiny foil connections. These turned out to be basically impossible to solder to. I tried hot-gluing the wires to the foil, but this did not work. What I’ll try next is to make the connections with conductive epoxy. If this works I’ll continue with the build.
What remains is to enclose the frame along the sides and install back-lighting for the LCDs. I’ve gotten a lot done so far and am excited to continue working on it. I’m taking a mixed media sculpture course at Steinhardt this semester, so perhaps I’ll complete it as an assignment for that.
Add comment | January 20th, 2011
4×4 Day 3: Music Video
By Matthew Rader on Day 3, January 2011
Shot a music video today for Twin Shadow. Can’t really show much for obvious reasons…

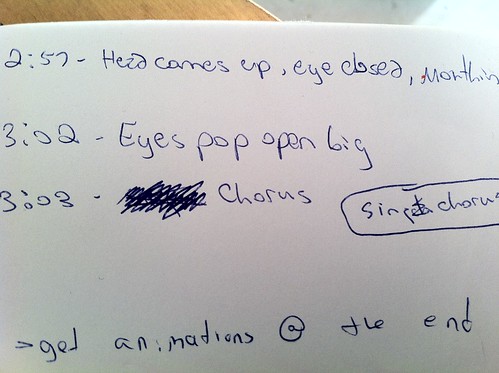

There is quite a bit of post production work to do now and that it going to round out my 4×4 week.
I spent quite a few hours Wednesday night/Thursday morning struggling to get Cineform’s video codec to render alpha channels – it doesn’t for the $100 neoscene pack. Anyone want to help a brutha out with Neo4k or Neo3D? In the frustration I did learn a cool feature of the Adobe Creative Suite CS5 called Adobe Dynamic Link. Remember how you have to render out all those After Effects comps to get them into timeline software, in this case Premiere, well if you have a kick ass computer, I do, you can use Premiere and simply import an AE sequence and bam. AE is open at the same time so changes you make in AE effect Premiere in real time. Hella cool and saves a lot of time especially when mocking this up quickly.
<3 rader
Add comment | January 20th, 2011
Day TWO – LEAF BOT
By Andy Jordan on Day 2, January 2011
I’m working on a series of sculptures that use mechanics to make magical things appear in nature. This is the first test, a wire mesh and leaf sculpture running on a slow dc geared motor. More on what it is in day one post

Add comment | January 19th, 2011
You Might As Well Jump
By spikem on Day 3
On Day 1 I took this picture of a friend jumping:

I liked the image so much, that I decided to do a Philippe Halsman-esque photoshoot of people jumping for my next project. I’ve been taking pictures with my Nikon D40x for about a year now, and as an amateur photographer I’m always looking for chances to improve my skills and try new things. This seemed like a more exciting way to investigate portrait photography, and I knew that I wouldn’t have many chances to take photos once the semester started.
A few of my favorite (hastily edited) photos follow. You can find the set (for what it’s worth) here.


2 comments | January 19th, 2011
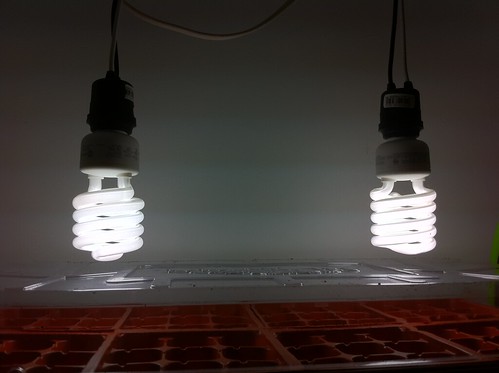
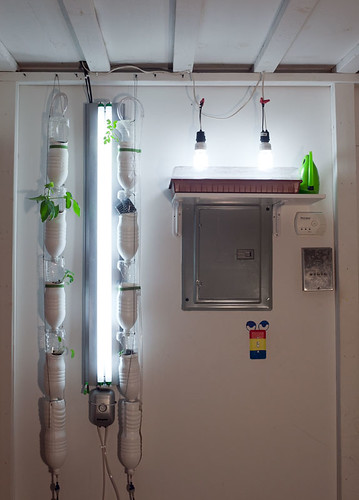
4×4 Day 2: Seedlings
By Matthew Rader on Day 2, January 2011
Expanded the interior garden area today by building a shelf and installing lighting for a new tray of seedlings.
Just broccoli, cauliflower for outside and another tomato plant for the WindowFarm for now…
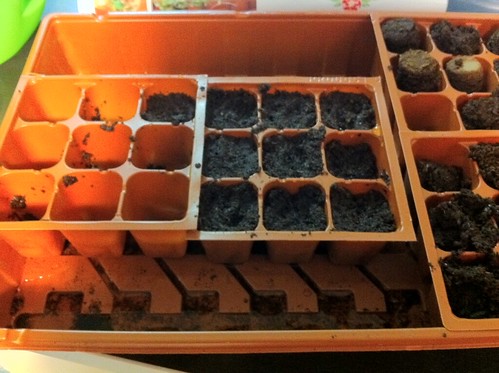
Cut an extension cord and split it to two bulb sockets with 100 watt 5500k CFLs.
Add comment | January 19th, 2011
pd-starterkit on github!
By yuditskaya on January 2011
pd-starterkit is now on github!
https://github.com/organizations/pd-starterkit/
and the first commit of a somewhat fleshed out menutree is there too.
access useful objects through a right click menu!
tomorrow tutorials!
Add comment | January 19th, 2011
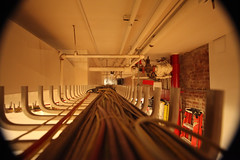
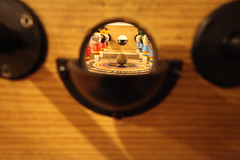
The Views Less Seen
By Mike Cohen on Day 3, January 2011
Here’s a bunch of photographs taken from vantage points that are not seen very often at ITP, if ever.
http://www.flickr.com/photos/tylerdurden3181/sets/72157625862952834/
some highlights:


Add comment | January 19th, 2011
Cinder…ugh
By Mike Cohen on Day 2, January 2011
In what seemed to be a catalyst for Greg B’s post on what makes a programming language good, I ran into similar issues. After spending most of my day attempting to really understand what I was doing with Cinder and not just copying and pasting code here and there, I ran into a ridiculous roadblock. My code compiles. MY CODE…all the code I was putting together compiled. This was after finding some stray hashes and semi-colons. After I got my code clean, I compiled again and I wound up with errors in assert.h and stexcept. Both of which are not in MY code, but in the cinder code.
UPDATE: Upon further consideration…there’s nothing wrong with Cinder. It’s just not telling me what exactly is the problem with my code.
here…have some errors:
Build FFT of project FFT with configuration Debug
CompileC build/FFT.build/Debug/FFT.build/Objects-normal/i386/FFTApp.o ../src/FFTApp.cpp normal i386 c++ com.apple.compilers.gcc.4_2
cd "/Users/michaelcohen/Documents/Cinder Projects/FFT/xcode"
setenv LANG en_US.US-ASCII
/Developer/usr/bin/gcc-4.2 -x c++ -arch i386 -fmessage-length=0 -pipe -Wno-trigraphs -fpascal-strings -fasm-blocks -O0 -Wreturn-type -Wunused-variable -isysroot /Developer/SDKs/MacOSX10.6.sdk -mfix-and-continue -fvisibility-inlines-hidden -mmacosx-version-min=10.5 -gdwarf-2 -iquote "/Users/michaelcohen/Documents/Cinder Projects/FFT/xcode/build/FFT.build/Debug/FFT.build/FFT-generated-files.hmap" "-I/Users/michaelcohen/Documents/Cinder Projects/FFT/xcode/build/FFT.build/Debug/FFT.build/FFT-own-target-headers.hmap" "-I/Users/michaelcohen/Documents/Cinder Projects/FFT/xcode/build/FFT.build/Debug/FFT.build/FFT-all-target-headers.hmap" -iquote "/Users/michaelcohen/Documents/Cinder Projects/FFT/xcode/build/FFT.build/Debug/FFT.build/FFT-project-headers.hmap" "-F/Users/michaelcohen/Documents/Cinder Projects/FFT/xcode/build/Debug" -iquote../../../../cinder_master/include -iquote../include "-I/Users/michaelcohen/Documents/Cinder Projects/FFT/xcode/build/Debug/include" -I../../../../cinder_master/boost "-I/Users/michaelcohen/Documents/Cinder Projects/FFT/xcode/build/FFT.build/Debug/FFT.build/DerivedSources/i386" "-I/Users/michaelcohen/Documents/Cinder Projects/FFT/xcode/build/FFT.build/Debug/FFT.build/DerivedSources" -include /var/folders/iF/iFQAD1uqFJe7A-ddlymUp++++TI/-Caches-/com.apple.Xcode.501/SharedPrecompiledHeaders/FFT_Prefix-bjvzihvszmjwomfykhprfwxbhlpa/FFT_Prefix.pch -c "/Users/michaelcohen/Documents/Cinder Projects/FFT/xcode/../src/FFTApp.cpp" -o "/Users/michaelcohen/Documents/Cinder Projects/FFT/xcode/build/FFT.build/Debug/FFT.build/Objects-normal/i386/FFTApp.o"
In file included from /Users/michaelcohen/Documents/Cinder Projects/FFT/xcode/Emitter.h:14,
from /Users/michaelcohen/Documents/Cinder Projects/FFT/xcode/../src/FFTApp.cpp:7:
../../../../cinder_master/include/cinder/gl/Texture.h:34: error: expected unqualified-id before 'namespace'
CompileC build/FFT.build/Debug/FFT.build/Objects-normal/i386/Particle.o Particle.cpp normal i386 c++ com.apple.compilers.gcc.4_2
cd "/Users/michaelcohen/Documents/Cinder Projects/FFT/xcode"
setenv LANG en_US.US-ASCII
/Developer/usr/bin/gcc-4.2 -x c++ -arch i386 -fmessage-length=0 -pipe -Wno-trigraphs -fpascal-strings -fasm-blocks -O0 -Wreturn-type -Wunused-variable -isysroot /Developer/SDKs/MacOSX10.6.sdk -mfix-and-continue -fvisibility-inlines-hidden -mmacosx-version-min=10.5 -gdwarf-2 -iquote "/Users/michaelcohen/Documents/Cinder Projects/FFT/xcode/build/FFT.build/Debug/FFT.build/FFT-generated-files.hmap" "-I/Users/michaelcohen/Documents/Cinder Projects/FFT/xcode/build/FFT.build/Debug/FFT.build/FFT-own-target-headers.hmap" "-I/Users/michaelcohen/Documents/Cinder Projects/FFT/xcode/build/FFT.build/Debug/FFT.build/FFT-all-target-headers.hmap" -iquote "/Users/michaelcohen/Documents/Cinder Projects/FFT/xcode/build/FFT.build/Debug/FFT.build/FFT-project-headers.hmap" "-F/Users/michaelcohen/Documents/Cinder Projects/FFT/xcode/build/Debug" -iquote../../../../cinder_master/include -iquote../include "-I/Users/michaelcohen/Documents/Cinder Projects/FFT/xcode/build/Debug/include" -I../../../../cinder_master/boost "-I/Users/michaelcohen/Documents/Cinder Projects/FFT/xcode/build/FFT.build/Debug/FFT.build/DerivedSources/i386" "-I/Users/michaelcohen/Documents/Cinder Projects/FFT/xcode/build/FFT.build/Debug/FFT.build/DerivedSources" -include /var/folders/iF/iFQAD1uqFJe7A-ddlymUp++++TI/-Caches-/com.apple.Xcode.501/SharedPrecompiledHeaders/FFT_Prefix-bjvzihvszmjwomfykhprfwxbhlpa/FFT_Prefix.pch -c "/Users/michaelcohen/Documents/Cinder Projects/FFT/xcode/Particle.cpp" -o "/Users/michaelcohen/Documents/Cinder Projects/FFT/xcode/build/FFT.build/Debug/FFT.build/Objects-normal/i386/Particle.o"
In file included from /Developer/SDKs/MacOSX10.6.sdk/usr/include/c++/4.2.1/cassert:49,
from ../../../../cinder_master/boost/boost/random/linear_congruential.hpp:20,
from ../../../../cinder_master/boost/boost/random.hpp:36,
from ../../../../cinder_master/include/cinder/Rand.h:25,
from /Users/michaelcohen/Documents/Cinder Projects/FFT/xcode/Particle.cpp:11:
/Developer/SDKs/MacOSX10.6.sdk/usr/include/assert.h:75: error: expected unqualified-id before string constant
CompileC build/FFT.build/Debug/FFT.build/Objects-normal/i386/Emitter.o Emitter.cpp normal i386 c++ com.apple.compilers.gcc.4_2
cd "/Users/michaelcohen/Documents/Cinder Projects/FFT/xcode"
setenv LANG en_US.US-ASCII
/Developer/usr/bin/gcc-4.2 -x c++ -arch i386 -fmessage-length=0 -pipe -Wno-trigraphs -fpascal-strings -fasm-blocks -O0 -Wreturn-type -Wunused-variable -isysroot /Developer/SDKs/MacOSX10.6.sdk -mfix-and-continue -fvisibility-inlines-hidden -mmacosx-version-min=10.5 -gdwarf-2 -iquote "/Users/michaelcohen/Documents/Cinder Projects/FFT/xcode/build/FFT.build/Debug/FFT.build/FFT-generated-files.hmap" "-I/Users/michaelcohen/Documents/Cinder Projects/FFT/xcode/build/FFT.build/Debug/FFT.build/FFT-own-target-headers.hmap" "-I/Users/michaelcohen/Documents/Cinder Projects/FFT/xcode/build/FFT.build/Debug/FFT.build/FFT-all-target-headers.hmap" -iquote "/Users/michaelcohen/Documents/Cinder Projects/FFT/xcode/build/FFT.build/Debug/FFT.build/FFT-project-headers.hmap" "-F/Users/michaelcohen/Documents/Cinder Projects/FFT/xcode/build/Debug" -iquote../../../../cinder_master/include -iquote../include "-I/Users/michaelcohen/Documents/Cinder Projects/FFT/xcode/build/Debug/include" -I../../../../cinder_master/boost "-I/Users/michaelcohen/Documents/Cinder Projects/FFT/xcode/build/FFT.build/Debug/FFT.build/DerivedSources/i386" "-I/Users/michaelcohen/Documents/Cinder Projects/FFT/xcode/build/FFT.build/Debug/FFT.build/DerivedSources" -include /var/folders/iF/iFQAD1uqFJe7A-ddlymUp++++TI/-Caches-/com.apple.Xcode.501/SharedPrecompiledHeaders/FFT_Prefix-bjvzihvszmjwomfykhprfwxbhlpa/FFT_Prefix.pch -c "/Users/michaelcohen/Documents/Cinder Projects/FFT/xcode/Emitter.cpp" -o "/Users/michaelcohen/Documents/Cinder Projects/FFT/xcode/build/FFT.build/Debug/FFT.build/Objects-normal/i386/Emitter.o"
In file included from ../../../../cinder_master/include/cinder/Color.h:26,
from /Users/michaelcohen/Documents/Cinder Projects/FFT/xcode/Emitter.h:13,
from /Users/michaelcohen/Documents/Cinder Projects/FFT/xcode/Emitter.cpp:10:
../../../../cinder_master/include/cinder/ChanTraits.h:29: error: expected unqualified-id before 'namespace'
In file included from ../../../../cinder_master/boost/boost/rational.hpp:59,
from ../../../../cinder_master/include/cinder/Area.h:30,
from ../../../../cinder_master/include/cinder/Rect.h:26,
from ../../../../cinder_master/include/cinder/gl/gl.h:41,
from ../../../../cinder_master/include/cinder/gl/Texture.h:26,
from /Users/michaelcohen/Documents/Cinder Projects/FFT/xcode/Emitter.h:14,
from /Users/michaelcohen/Documents/Cinder Projects/FFT/xcode/Emitter.cpp:10:
/Developer/SDKs/MacOSX10.6.sdk/usr/include/c++/4.2.1/stdexcept:47: error: expected declaration before end of line
If anyone has ideas, lemme know. I’m pretty much at a complete impasse.
Add comment | January 19th, 2011
Maya
By Mike Cohen on Day 1, January 2011
3D modeling for me, goes way back to somewhere around 1990 with Lightwave 3D on an Amiga 2000. While that sounds like I’m some sort of pro, I didn’t say I was good at using it. I played around with it every so often, but I never really got anything good out of it. Most likely because I was 9 at the time and 3D modeling software wasn’t made for and still isn’t made for 9 year olds. In an effort to relive my childhood and actually model something in 3D, I used a student version of Maya and ran through the first two tutorials for it.
Getting started was a bit slow. It wasn’t the easiest interface to get used to. The first tutorial involved making a temple…sort of Jefferson Memorial-ish.


This took me about an hour to run through. Getting used to moving objects in 3D took a little time. Aligning the columns at first was awkward, but I got the hang of it eventually.
After the temple, the second tutorial involves making a Halo-ish type of helmet. I never thought to create a 3D model based off a sketch, most likely because I never think about making 3D models. Makes a lot of sense though.

This tutorial took about 2 hours. I would say the one thing I learned was when the Maya tutorial says to do something and you don’t see it easily, hold the space bar and it’ll probably be right there. After a while, following the directions was quick and easy. I found that the workflow was pretty decent, but I would’ve liked to know some keyboard shortcuts, if there are any.

Next step is to make something from scratch.
Add comment | January 19th, 2011
Day One – Linkage Prototyping
By Andy Jordan on Day 1, January 2011
Day ONE– Linkage Prototyping
After a trip to the toy store, and a good amount of time looking at linkage games online, I decided to make my own linkage prototype system. It consists of a medium gage wire, machine screws, and screw caps. I bend each wire segment at the ends as close to a circle as I can. Then fit the machine screw under each of the wire ends and cap it to make a linkage. Pretty easy.
As the first test of a piece I’m making for tomorrow, I made two of Theo Jansen’s mechanisms outlined on this great site. http://www.mechanisms101.com/theo_jansen.html
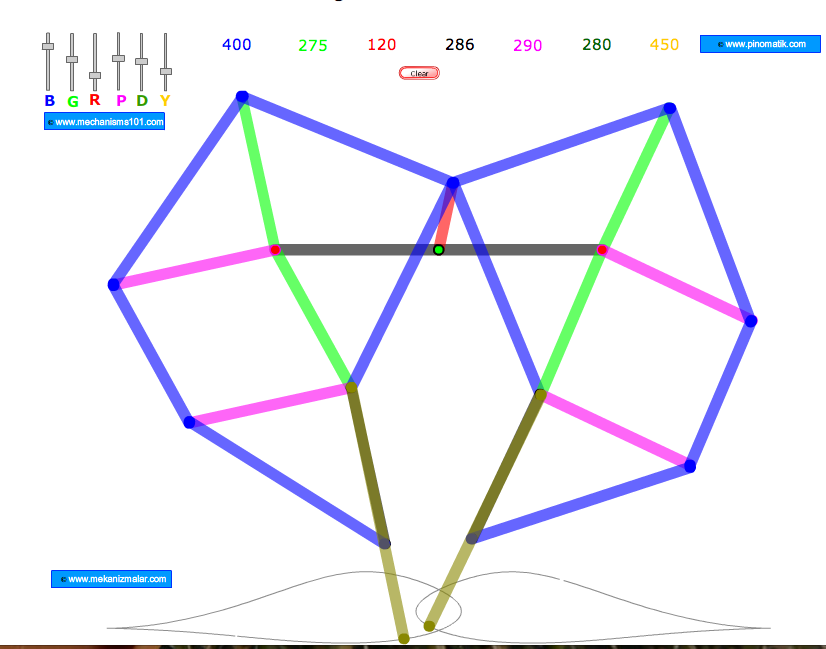
One of the fails of this system is that the screw caps will be wound or unwound by normal twisting and turning of the linkages. To solve this, you can hot glue the caps into place.
O
Video of the piece being uploaded now. Will update when finished
1 comment | January 19th, 2011
